Mac
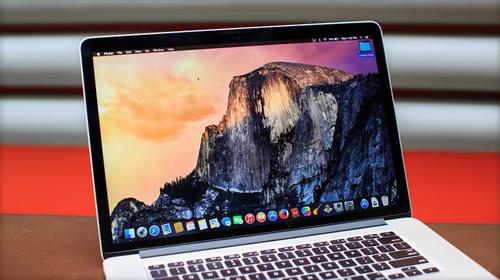
OS X 10.10 Yosemite is out, but there are four things you need to do
before upgrading your Mac to Apple’s latest operating system.
1. Check if your Mac is able to run Yosemite.According to Apple, the following are the supported models for Yosemite:
- iMac (mid 2007 or newer)
- MacBook (late 2008 Aluminum, or early 2009 or newer)
- MacBook Pro (mid/late 2007 or newer)
- MacBook Air (late 2008 or newer)
- Mac mini (early 2009 or newer)
- Mac Pro (early 2008 or newer)
- Xserve (early 2009)
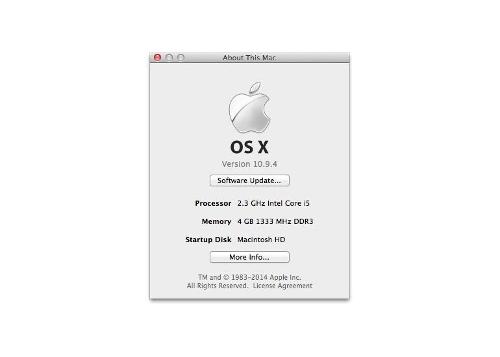
If you can’t remember your Mac’s vintage, click the Apple logo in the upper-left corner and choose About This Mac. A small window will pop up, showing basic system information.

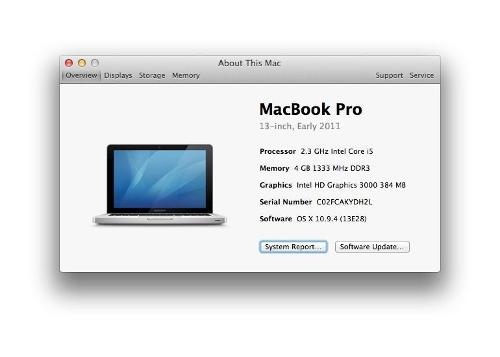
To see what year your Mac was made, click the More Info button, and you’ll see a bit more system information, including your Mac’s era in gray lettering below its name.

2. Make sure you have enough memory and hard drive space.
Among Yosemite’s general
requirements are a minimum of 2 GB of memory and at least 8 GB of
available space. The memory amount is shown on the main About This Mac
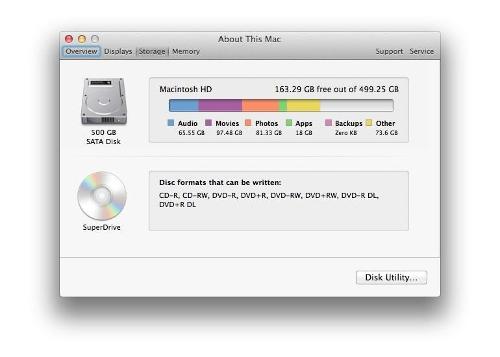
screen from above. To see how much space you have on your Mac’s hard
drive or SSD, click the More Info button again and then click Storage at the top of the window.

For information on upgrading your Mac’s memory, read this article. Or watch this video about how to upgrade the RAM on a MacBook Pro.
3. Check your current OS X version.If
you haven’t updated your Mac’s operating system in a number of years,
then you need to check to see if you are running at least OS X 10.6.8
Snow Leopard, which was released way back in 2009. Its 10.6.6 update
introduced the Mac App Store, which you’ll need to download Yosemite.
The About This Mac window will show which version of OS X you have. You
need be running one of the following:
- OS X Snow Leopard (10.6.8)
- OS X Lion (10.7)
- OS X Mountain Lion (10.8)
- OS X Mavericks (10.9)
If you have an ancient Mac whose
OS predates Snow Leopard, you will need to install Snow Leopard before
then moving to Yosemite. You can buy Snow Leopard for $19.99 here.
4. Before you do anything, back up your Mac.If
you have determined that your Mac can run Yosemite, then your first
move before upgrading is always to perform a system backup to protect
your data. Should the installation go awry, you don’t want to lose
important documents along with your photo and music libraries.
Thankfully, Macs include a tool that make backups easy: Time Machine.
Learn how to set up Time Machine on your Mac here.
How to Prepare Your Mac for the OS X Yosemite Upgrade

Mac
OS X 10.10 Yosemite is out, but there are four things you need to do
before upgrading your Mac to Apple’s latest operating system.
1. Check if your Mac is able to run Yosemite.According to Apple, the following are the supported models for Yosemite:
- iMac (mid 2007 or newer)
- MacBook (late 2008 Aluminum, or early 2009 or newer)
- MacBook Pro (mid/late 2007 or newer)
- MacBook Air (late 2008 or newer)
- Mac mini (early 2009 or newer)
- Mac Pro (early 2008 or newer)
- Xserve (early 2009)
If you can’t remember your Mac’s vintage, click the Apple logo in the upper-left corner and choose About This Mac. A small window will pop up, showing basic system information.

To see what year your Mac was made, click the More Info button, and you’ll see a bit more system information, including your Mac’s era in gray lettering below its name.

2. Make sure you have enough memory and hard drive space.
Among Yosemite’s general
requirements are a minimum of 2 GB of memory and at least 8 GB of
available space. The memory amount is shown on the main About This Mac
screen from above. To see how much space you have on your Mac’s hard
drive or SSD, click the More Info button again and then click Storage at the top of the window.

For information on upgrading your Mac’s memory, read this article. Or watch this video about how to upgrade the RAM on a MacBook Pro.
3. Check your current OS X version.If
you haven’t updated your Mac’s operating system in a number of years,
then you need to check to see if you are running at least OS X 10.6.8
Snow Leopard, which was released way back in 2009. Its 10.6.6 update
introduced the Mac App Store, which you’ll need to download Yosemite.
The About This Mac window will show which version of OS X you have. You
need be running one of the following:
- OS X Snow Leopard (10.6.8)
- OS X Lion (10.7)
- OS X Mountain Lion (10.8)
- OS X Mavericks (10.9)
If you have an ancient Mac whose
OS predates Snow Leopard, you will need to install Snow Leopard before
then moving to Yosemite. You can buy Snow Leopard for $19.99 here.
4. Before you do anything, back up your Mac.If
you have determined that your Mac can run Yosemite, then your first
move before upgrading is always to perform a system backup to protect
your data. Should the installation go awry, you don’t want to lose
important documents along with your photo and music libraries.
Thankfully, Macs include a tool that make backups easy: Time Machine.
Learn how to set up Time Machine on your Mac here.


